Terraform is an open-source software to manage cloud infrastructure in code. With just a few lines of code we can boot up instances, create buckets, provision databases and many other resources. At the same time Terraform allows to dynamically change and evolve infrastructure in a reproducible way. In our case we will use Terraform to launch our own jupyterhub (using the littlest jupyterhub distribution) on AWS, utilizing a mounted S3 bucket for permanent storage.
The complete setup can be found on GitHub, a very good intro to Terraform can be found on the HashiCorp website.
We will start with a very short intro to Terraform (>=0.12), consisting of three steps: define, plan, apply. Creating an EC2 instance and a S3 bucket is very simple: we define the resources, for example in a file called example.tf:
provider "aws" {
  region     = "eu-central-1"
  access_key = "my-access-key"
  secret_key = "my-secret-key"
}

resource "aws_instance" "my_tf_test_instance" {
  ami                    = "ami-0b418580298265d5c"
  instance_type          = "t2.nano"
}

resource "aws_s3_bucket" "my_tf_test_bucket" {
  bucket = "my-fantastic-tf-test-bucket"
  acl    = "private"
}
Once we plan via terraform plan we can verify which actions Terraform wants to perform to create our resources:
An execution plan has been generated and is shown below.
Resource actions are indicated with the following symbols:
  + create

Terraform will perform the following actions:

  # aws_instance.my_tf_test_instance will be created
  + resource "aws_instance" "my_tf_test_instance" {
      + ami                          = "ami-0b418580298265d5c"
      + arn                          = (known after apply)
      + associate_public_ip_address  = (known after apply)
      + availability_zone            = (known after apply)
      + cpu_core_count               = (known after apply)
      + cpu_threads_per_core         = (known after apply)
      + get_password_data            = false
      + host_id                      = (known after apply)
      + id                           = (known after apply)
      + instance_state               = (known after apply)
      + instance_type                = "t2.medium"
      + ipv6_address_count           = (known after apply)
      + ipv6_addresses               = (known after apply)
      + key_name                     = (known after apply)
      + network_interface_id         = (known after apply)
      + password_data                = (known after apply)
      + placement_group              = (known after apply)
      + primary_network_interface_id = (known after apply)
      + private_dns                  = (known after apply)
      + private_ip                   = (known after apply)
      + public_dns                   = (known after apply)
      + public_ip                    = (known after apply)
      + security_groups              = (known after apply)
      + source_dest_check            = true
      + subnet_id                    = (known after apply)
      + tenancy                      = (known after apply)
      + volume_tags                  = (known after apply)
      + vpc_security_group_ids       = (known after apply)

      + ebs_block_device {
          + delete_on_termination = (known after apply)
          + device_name           = (known after apply)
          + encrypted             = (known after apply)
          + iops                  = (known after apply)
          + kms_key_id            = (known after apply)
          + snapshot_id           = (known after apply)
          + volume_id             = (known after apply)
          + volume_size           = (known after apply)
          + volume_type           = (known after apply)
        }

      + ephemeral_block_device {
          + device_name  = (known after apply)
          + no_device    = (known after apply)
          + virtual_name = (known after apply)
        }

      + metadata_options {
          + http_endpoint               = (known after apply)
          + http_put_response_hop_limit = (known after apply)
          + http_tokens                 = (known after apply)
        }

      + network_interface {
          + delete_on_termination = (known after apply)
          + device_index          = (known after apply)
          + network_interface_id  = (known after apply)
        }

      + root_block_device {
          + delete_on_termination = (known after apply)
          + device_name           = (known after apply)
          + encrypted             = (known after apply)
          + iops                  = (known after apply)
          + kms_key_id            = (known after apply)
          + volume_id             = (known after apply)
          + volume_size           = (known after apply)
          + volume_type           = (known after apply)
        }
    }

  # aws_s3_bucket.my_tf_test_bucket will be created
  + resource "aws_s3_bucket" "my_tf_test_bucket" {
      + acceleration_status         = (known after apply)
      + acl                         = "private"
      + arn                         = (known after apply)
      + bucket                      = "my-fantastic-tf-test-bucket"
      + bucket_domain_name          = (known after apply)
      + bucket_regional_domain_name = (known after apply)
      + force_destroy               = false
      + hosted_zone_id              = (known after apply)
      + id                          = (known after apply)
      + region                      = (known after apply)
      + request_payer               = (known after apply)
      + website_domain              = (known after apply)
      + website_endpoint            = (known after apply)

      + versioning {
          + enabled    = (known after apply)
          + mfa_delete = (known after apply)
        }
    }

Plan: 2 to add, 0 to change, 0 to destroy.
If we are happy with the plan we can delegate Terraform to create the planned two resources by using terraform apply:
aws_instance.my_tf_test_instance: Creating...
aws_s3_bucket.my_tf_test_bucket: Creating...
aws_s3_bucket.my_tf_test_bucket: Still creating... [10s elapsed]
aws_instance.my_tf_test_instance: Still creating... [10s elapsed]
aws_s3_bucket.my_tf_test_bucket: Creation complete after 11s [id=my-fantastic-tf-test-bucket]
aws_instance.my_tf_test_instance: Still creating... [20s elapsed]
aws_instance.my_tf_test_instance: Creation complete after 25s [id=i-05f10xxxxxxdde4b]

Apply complete! Resources: 2 added, 0 changed, 0 destroyed.
Since Terraform tracks state and can also apply differences we can easily modify our already created resources, for example by changing our instance type or adding versioning to our S3 bucket and applying again:
resource "aws_instance" "my_tf_test_instance" {
  ami                    = "ami-0b418580298265d5c"
  instance_type          = "t2.nano"
}

resource "aws_s3_bucket" "my_tf_test_bucket" {
  bucket = "my-fantastic-tf-test-bucket"
  acl    = "private"

  versioning {
    enabled = true
  }
}
Once we plan again we will see a nicely rendered view of the differences:
Refreshing Terraform state in-memory prior to plan...
The refreshed state will be used to calculate this plan, but will not be
persisted to local or remote state storage.

aws_s3_bucket.my_tf_test_bucket: Refreshing state... [id=my-fantastic-tf-test-bucket]
aws_instance.my_tf_test_instance: Refreshing state... [id=i-05f10xxxxxxdde4b]

------------------------------------------------------------------------

An execution plan has been generated and is shown below.
Resource actions are indicated with the following symbols:
  ~ update in-place

Terraform will perform the following actions:

  # aws_instance.my_tf_test_instance will be updated in-place
  ~ resource "aws_instance" "my_tf_test_instance" {
        ami                          = "ami-0b418580298265d5c"
        ...
      ~ instance_type                = "t2.medium" -> "t2.nano"
        ...
    }

  # aws_s3_bucket.my_tf_test_bucket will be updated in-place
  ~ resource "aws_s3_bucket" "my_tf_test_bucket" {
        acl                         = "private"
        arn                         = "arn:aws:s3:::my-fantastic-tf-test-bucket"
        bucket                      = "my-fantastic-tf-test-bucket"
        ...
      ~ versioning {
          ~ enabled    = false -> true
            mfa_delete = false
        }
    }

Plan: 0 to add, 2 to change, 0 to destroy.
Now let us get a bit more fancy and deploy our own juypterhub on an EC2 instance served with Ubuntu, including mounted S3 storage to persist data.
In Terraform we can define variables, for ex. in a vars.tf file, which can be referenced in other modules using var.var_name (for ex. var.instance_type):
variable "aws_access_key" {}

variable "aws_secret_key" {}

variable "aws_region" {
  default = "eu-central-1"
}

variable "amis" {
  type = map(string)
  default = {
    eu-central-1 = "ami-0b418580298265d5c"
    us-east-1    = "ami-07ebfd5b3428b6f4d"
  }
}

variable "instance_type" {
  default = "t2.large"
}

variable "bucket_name" {
  default = "jh-storage"
}
We can leave the confidential ones empty and define them in an unstaged terraform.tfvars file:
aws_access_key = "my-access-key"
aws_secret_key = "my-secret-key"
aws_region     = "eu-central-1"
jh_password    = "some-password-to-jh-ub"
Since we will use AWS as our provider we will define a provider.tf as follows:
provider "aws" {
  access_key = var.aws_access_key
  secret_key = var.aws_secret_key
  region     = var.aws_region
}
In a main.tf we can define our instance plus security group to allow inbound traffic through SSH and HTTP/HTTPS and all outbound traffic, moreover we add an iam_instance_profile which will be explained later. As you can see we can reference variables and other resources with the dot-notation, so the security group for our instance via aws_security_group.instance.id, our instance via aws_instance.jh, and so on. Additionally we will use templatefile to load a shell script and render contained variables.
resource "aws_instance" "jh" {
  ami                    = lookup(var.amis, var.aws_region)
  instance_type          = var.instance_type
  vpc_security_group_ids = [aws_security_group.instance.id]
  iam_instance_profile   = aws_iam_instance_profile.jh.name

  user_data = templatefile("script/install.sh", {
    aws_region = var.aws_region
    bucket_name = var.bucket_name
    password = var.password
  })

  tags = {
    Name = "jh"
  }
}

resource "aws_security_group" "instance" {
  ingress {
    from_port   = 22
    to_port     = 22
    protocol    = "tcp"
    cidr_blocks = ["0.0.0.0/0"]
  }

  ingress {
    from_port   = 80
    to_port     = 80
    protocol    = "tcp"
    cidr_blocks = ["0.0.0.0/0"]
  }

  ingress {
    from_port   = 443
    to_port     = 443
    protocol    = "tcp"
    cidr_blocks = ["0.0.0.0/0"]
  }

  egress {
    from_port   = 0
    to_port     = 0
    protocol    = -1
    cidr_blocks = ["0.0.0.0/0"]
  }

  tags = {
    Name = "jh"
  }
}
The user data for an instance is a script which is executed on initial(!) launch of the instance. Here we reference a bash script script/install.sh which includes some variables (aws_region, bucket_name, password) which will get rendered by templatefile:
#!/bin/bash
sudo sudo apt-get update

# install s3fs & mount bucket
sudo apt-get install s3fs
sudo s3fs \
	-o iam_role="auto" \
	-o url="https://s3-${aws_region}.amazonaws.com" \
	-o umask=000 \
	-o allow_other \
	${bucket_name} /mnt

# install tljh
curl https://raw.githubusercontent.com/jupyterhub/the-littlest-jupyterhub/master/bootstrap/bootstrap.py \
	| sudo python3 - \
	--admin admin:${password} \
	--user-requirements-txt-url https://raw.githubusercontent.com/stelsemeyer/aws-tf-jh/master/script/requirements.txt
The setup script will install and run s3fs to mount our S3 bucket using an (auto-detected) IAM role to allow access. We also need to specify allow_other and umask=000 to allow all users to read and write all files in that folder.
Afterwards the setup script from “the littlest jupyterhub” (tljh) will install jupyterhub, set up a user named admin with our password from the Terraform variables and preinstall packages from the requirements.txt file.
What is still missing is our IAM role to enable seamless access to our S3 bucket from our EC2. We can define our policies (normally json) in a data.tf and reference them again in our role related resources in the following way:
data "aws_iam_policy_document" "s3" {
  statement {
    actions = [
      "s3:*"
    ]

    # add our bucket and all contained files
    resources = [
      "arn:aws:s3:::${var.bucket_name}",
      "arn:aws:s3:::${var.bucket_name}/*"
    ]
  }
}

data "aws_iam_policy_document" "sts" {
  statement {
    actions = [
      "sts:AssumeRole"
    ]

    principals {
      type        = "Service"
      identifiers = ["ec2.amazonaws.com"]
    }
  }
}
To our main.tf we will add:
resource "aws_iam_role" "jh" {
  name               = "jh_role"
  assume_role_policy = data.aws_iam_policy_document.sts.json

  tags = {
    Name = "jh"
  }
}

resource "aws_iam_instance_profile" "jh" {
  role = aws_iam_role.jh.name
}

resource "aws_iam_role_policy" "jh" {
  role   = aws_iam_role.jh.id
  policy = data.aws_iam_policy_document.s3.json
}
Putting this all together we can start to plan & apply our infrastructure:
- tf modules:
provider.tf,vars.tf,data.tf,main.tf - setup script
install.shfor installation of s3fs & tljh terraform.tfvarswith credentials
After around 10 to 15 minutes we can visit our instance via our public hostname shown in the output:
Outputs:

public_dns = ec2-aa-bb-cc-dd.eu-central-1.compute.amazonaws.com
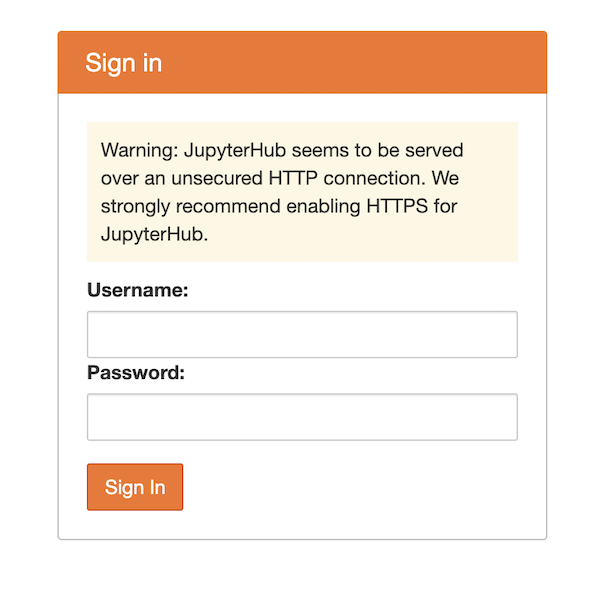
You should see the following login page:
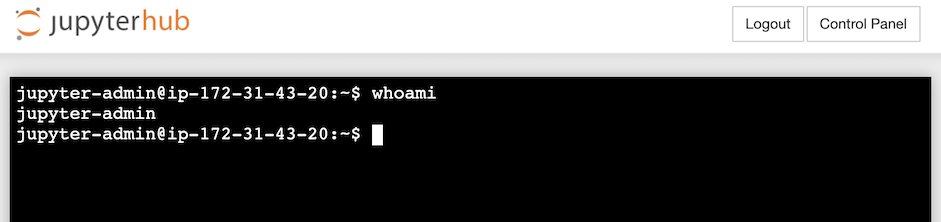
You can also access a terminal of the instance via New > Terminal:
Let’s try out our S3 connection by storing some data in our mounted folder and check if it appears in our bucket. Theoretically we could also use boto in a very comfortable way (no extra authentication needed) to fetch data from our (or if defined in our policy) other buckets:
import pandas as pd
import boto3

# create dummy data and upload
data = pd.DataFrame({'a': [1,2,3]})
data.to_csv('/mnt/data.csv', index=False)

# download dummy data
client = boto3.client('s3', region_name='eu-central-1')
client.download_file('jh-storage', 'data.csv', '/tmp/data_download.csv')

# compare
data_downloaded = pd.read_csv('/tmp/data_download.csv')
data.equals(data_downloaded)
## True
Some things left to be improved: It’s a good practice to run Terraform within docker, treating it itself as an application and tracking state with S3 or similar backend. Moreover rescaling our instance currently unmounts the S3 bucket (because the user data is only run when the instance is initially created). We could use a script to restart S3fs and remount S3 after restart/resize of instance, for ex. cloud init. Additionally we should use secure http: tljh offers a readymade solution via letsencrypt, which unfortunately does not work with AWS-branded endpoints but requires a proper domain (for ex. via Route 53).
We have learned the basics of Terraform, how to use templating and variables and combine different resources efficiently and neatly in code, allowing us to spawn instances for one-off analysis or hackathons with ease.
As an alternative to the hosted notebook setup be advised that we can use AWS Sagemarker or Google Notebooks, which are somewhat serverless solutions and come with many preinstalled frameworks for Auto ML, Deep Learning, etc.